How to Find What Motherboard I Have – Quick Check (2025-2026)
You can find what motherboard you have by opening System Information on Windows, where the exact model and manufacturer are clearly shown. I use this same method when checking my clients’ PCs. It’s quick, safe, and helps you choose the right parts before upgrading anything.
If you’re trying to learn how to find out what motherboard I have, you’re not alone. Many PC users need this information when they upgrade parts, fix issues, or check compatibility. The good news is that you don’t need any special skills to find it. With a few quick steps, you can confirm your motherboard model on Windows without opening your computer. In this guide, I’ll walk you through each method in a clear and friendly way, so you can understand everything easily and avoid mistakes. My goal is to help you get the right details fast and with full confidence.
How to Find Out What Motherboard I Have (Complete Guide + All Working Methods)
If you’re trying to upgrade your PC, add new RAM, install a new SSD, or check if your processor is compatible, the very first question that comes to mind is:
“How to find out what motherboard I have?”
Don’t worry, this is one of the most common questions PC users ask.
And the good news?
It’s very easy once someone explains it in simple words.
In this ultra-detailed guide, you’ll learn:
✔ All easy and advanced methods
✔ Methods with and without software
✔ Windows, BIOS, Linux, laptop, and physical methods
✔ How to understand your motherboard model
✔ How to use the information for upgrades
✔ Full compatibility guidance
✔ Beginner mistakes to avoid
Think of this as the ultimate guide. After reading it, you will never get confused again.
What Is a Motherboard? (Simple Explanation + Family Example)
To understand your motherboard, imagine your computer is a big family living in one house.
- CPU → The father (takes decisions)
- RAM → The kids (active, doing quick tasks)
- Storage → The cupboards (store everything)
- GPU → The family member who handles all visuals
- Motherboard → The entire house floor that connects everyone
Nothing can work without the motherboard.
It connects every part, gives power, and allows communication.
Just like a home floor connects all rooms,
The motherboard connects all components.
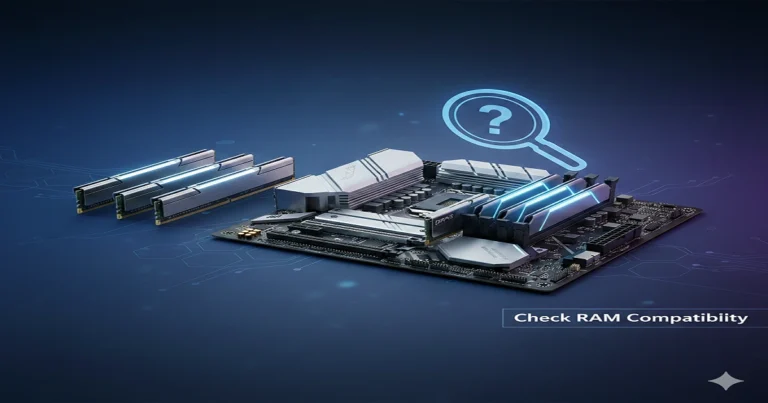
Why You Must Know Your Motherboard Model
You need your motherboard model when you want to:
✔ Upgrade CPU
✔ Add more RAM
✔ Install a new SSD (SATA or NVMe)
✔ Check if DDR4 or DDR5 fits
✔ Update BIOS
✔ Install new GPU
✔ Fix system issues
✔ Solve boot problems
✔ Check PCIe support
✔ Solve RAM not working issues
If you don’t know your motherboard model, you might buy the wrong part, similar to buying a bed that is larger than your room.
It won’t fit.
It won’t work.
And you will waste money.
How to Find Out What Motherboard I Have (ALL 12 WORKING METHODS)
You only need one method, but I’m showing everything so that you can choose the easiest option for yourself.
Method 1: Using Windows System Information (Fastest & Easiest)
This method works on all Windows versions.
Steps:
- Press Windows + R
- Type msinfo32
- Press Enter
- A System Information window will open.
Look for:
- BaseBoard Manufacturer
- BaseBoard Product
- BaseBoard Version
Example:
- Manufacturer: ASUS
- Product: PRIME B450M-A
- Version: Rev X.0X
This is your exact motherboard model.
This method is simple, like checking the name on a school notebook.
Method 2: Using Command Prompt (More Accurate)
Steps:
- Search CMD
- Right-click → Run as Administrator.
- Type this command:
wmic baseboard get product, manufacturer, version,serialnumber
You’ll instantly see:
- Manufacturer
- Model
- Version
- Serial Number
This information comes directly from BIOS → 100% accurate.
Method 3: Using Windows PowerShell (Advanced Formatting)
Steps:
- Search PowerShell
- Run as Administrator
- Type:
Get-WmiObject win32_baseboard
This method gives detailed output.
If CMD is like a quick text message,
PowerShell is like a full email cleaner and is more detailed.
Method 4: Check Through BIOS/UEFI (Works Even If Windows Is Not Booting)
If your Windows is not starting, this method can save the day.
Steps:
- Restart your PC
- Press BIOS key:
- DEL / F2 → ASUS, MSI, Gigabyte
- F1 / F2 → Lenovo
- F10 → HP
- Look for:
- System Information
- Motherboard Information
- Mainboard Model
You will see something like:
- MSI B560M PRO
- ASUS PRIME B660M-A
- Gigabyte B550 DS3H
This is extremely reliable because it reads the motherboard directly.
Method 5: Use CPU-Z (One-Click Full Information)
(Recommended for beginners upgrading RAM or CPU)
CPU-Z is a free tool that gives complete motherboard details.
Steps:
- Install CPU-Z
- Open it
- Go to the Mainboard tab.
You will find:
- Manufacturer
- Model
- Socket
- BIOS Version
- PCIe Information
- Chipset details
This is the easiest method for beginners and PC builders.
Method 6: Physically Check the Motherboard (For Desktop Users)
If you have a desktop PC, this is extremely simple.
Steps:
- Turn off the PC
- Remove the power cable.
- Open the side panel
- Look near:
- RAM slots
- CPU socket
- PCIe slots
You will find something like:
- ASUS PRIME B660M-A
- MSI B450 Tomahawk
- Gigabyte Z690 AORUS ELITE
It is written clearly on the board like a nameplate on a house.
Method 7: Check the Motherboard Box or Invoice
If your PC was built recently, the motherboard box will clearly show:
- Brand
- Model
- Chipset
- Socket
- Form factor
If you bought a branded PC (Dell, HP, Lenovo), your invoice will include the model number.
Method 8: Laptop Users: Use Manufacturer Software
Laptop motherboards have internal codes, not simple names like desktop boards.
Use:
- HP Support Assistant
- Lenovo Vantage
- Dell SupportAssist
Go to System Information → Motherboard.
You will see the motherboard ID like:
- LA-H091P
- VBW00
- LNVNB161216
These codes are motherboard identifiers used by laptop brands.
✔ ADVANCED METHODS (Complete Coverage for Deep Accuracy)
These methods are important when basic tools don’t show full details.
Method 9: Windows Registry (Hidden but Deep Information)The registryy is like the “brain notes” of your PC.
Steps:
- Press Windows + R
- Type regedit
- Go to:
Computer\HKEY_LOCAL_MACHINE\HARDWARE\DESCRIPTION\System\BIOS
Here you will find:
- BaseBoardProduct
- BaseBoardManufacturer
- BIOSVersion
- SystemSKU
This method shows detailed motherboard info.
Method 10: Linux Users: Use dmidecode
For users of Ubuntu, Fedora, Mint, etc.
Use this command:
Sudo dmidecode -t baseboard
Shows:
- Manufacturer
- Product Name
- Version
- Serial Number
Linux gives extremely accurate motherboard data because it reads hardware directly.
Method 11: Using Chipset Utility (Smart For Upgrades)
Download chipset software:
- Intel Chipset Utility
- AMD Chipset Software
These tools detect:
- Chipset generation
- Supported CPUs
- Supported RAM types
- PCIe lane support
- USB compatibility
This helps you avoid buying parts that don’t work.
Method 12: Third-Party Tools Like HWInfo (Professional Use)
HWInfo is the most advanced hardware tool.
It shows:
- VRM model
- Temperature sensors
- PCIe bandwidth
- M.2 slot types
- BIOS date
- Chipset features
Perfect for PC builders and repair technicians.
Understanding Your Motherboard Model (Simple Breakdown for Beginners)
Once you find your motherboard model, the next step is understanding what it means.
Most model names look confusing, but don’t worry I’ll explain them using a family example, so everything feels simple.
Example motherboard:
ASUS PRIME B450M-A II
Breakdown:
- ASUS → Brand
- PRIME → Series
- B450 → Chipset (controls features)
- M → Micro ATX size
- A → Variant
- II → Second version
Think of it like a person’s full name:
Name → Middle name → Family name → City → House number → Street number.
Once you understand these parts, you can easily pick compatible hardware.
Understanding Chipsets (Easiest Family Example)
Imagine your home again…
- Chipset = The mother
She decides what is allowed in the house. - CPU = Father
- RAM = Kids
- GPU = Relatives who visit
The chipset decides:
✔ Which CPUs can you use
✔ What RAM speed can you install
✔ How many SSDs can you add
✔ Whether overclocking is allowed
✔ How fast PCIe slots work
Simple chipset examples:
- B450 chipset → Supports Ryzen 1000–3000 (and some 5000)
- B660 chipset → Supports Intel 12th & 13th Gen
- Z690 chipset → High-end; supports overclocking
So, knowing your chipset helps you upgrade safely without wasting money.
Understanding Motherboard Sizes (Form Factor Guide)
Motherboards come in different sizes:
1. ATX (Large)
More slots, more features.
2. Micro ATX (Medium)
Balanced, fits most cases.
3. Mini ITX (Small)
Very small, fewer ports.
Simple Example:
Think of them like beds in a room:
- King-size bed → ATX
- Queen-size bed → Micro ATX
- Single bed → Mini ITX
A big bed doesn’t fit in a tiny room.
Similarly, a big ATX motherboard cannot fit in a small case.
Motherboard Information Cheat Sheet (Easy-to-Remember Table)
| Term | Meaning | Example |
| Manufacturer | Brand | ASUS, MSI |
| Model | Specific name | B450 Tomahawk |
| Chipset | Controls features | B450, X570, Z690 |
| Form Factor | Size | ATX, mATX, ITX |
| Socket | CPU fit type | AM4, LGA1700 |
If you know these five things, you can upgrade your PC correctly.
Common Mistakes Beginners Make (And How to Avoid Them)
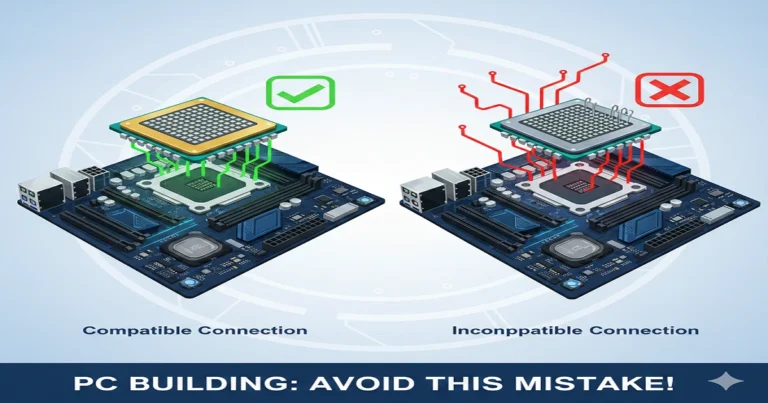
❌ Mistake 1: Buying the wrong CPU
Every motherboard supports only one socket.
- AM4 CPUs → AM4 motherboards
- LGA1700 CPUs → LGA1700 motherboards
Wrong socket = it physically won’t fit.
❌ Mistake 2: Buying the wrong RAM
You cannot put DDR4 RAM into a DDR5 motherboard.
It’s like trying to put a big key into a small lock it doesn’t fit.
❌ Mistake 3: Ignoring BIOS version
Some motherboards need a BIOS update before newer CPUs work.
Example:
Older B450 motherboards need a BIOS update for Ryzen 5000.
❌ Mistake 4: Thinking laptop motherboards work like desktops
Desktop boards have big names.
Laptops use hidden internal codes.
That’s normal don’t get confused.
Signs Your Motherboard Information Might Be Wrong
If your model does not appear in:
- msinfo32
- CMD
- CPU-Z
- BIOS
Then your system may have:
✔ Corrupted BIOS
✔ OEM motherboard with hidden ID
✔ Prebuilt PC motherboard
✔ Laptop motherboard with internal code
If this happens, CPU-Z and BIOS give the most reliable results.
Motherboard Compatibility Guide (What You Can Upgrade)
Now that you know how to find out what motherboard I have, let’s see what upgrades you can make safely.
1. CPU Compatibility
Check two things:
- Socket
- Chipset support
Examples:
- B450 → Ryzen 1000–3000 + some 5000
- B550 → Ryzen 3000 & 5000
- Z690 → Intel 12th & 13th Gen
Always check the official motherboard page before buying a CPU.
2. RAM Compatibility
Check:
- DDR type: DDR3, DDR4, or DDR5
- Maximum RAM speed (MHz)
- Maximum capacity (ex, 64GB or 128GB)
Example:
If your motherboard supports DDR4 → only buy DDR4.
DDR5 RAM will not fit.
3. Storage Compatibility
Your motherboard may support:
- SATA SSDs
- NVMe PCIe 3.0 SSDs
- NVMe PCIe 4.0 SSDs
- NVMe PCIe 5.0 SSDs
Older boards (before 2016) usually don’t support NVMe.
4. GPU Compatibility
All modern GPUs work on PCIe slots.
But check:
- PCIe version
- Case size
- Power supply wattage
Example:
A big GPU won’t fit in a small case like trying to fit a large sofa in a tiny room.
5. BIOS Updates
BIOS updates add:
✔ New CPU support
✔ Performance upgrades
✔ Better stability
✔ Security patches
Always download from your official brand website.
Beginner-Friendly Upgrade Examples
Example 1: Upgrading RAM
If System Info says your board supports DDR4 → buy DDR4 only.
Example 2: Upgrading CPU
If your board is B450 → you cannot install Ryzen 7000.
Different socket → different family.
Example 3: Installing SSD
If you see an M.2 NVMe slot → you can install fast NVMe SSDs.
Simple as that.
Why It’s Important to Know Your Motherboard (Advanced Reasoning)
Your motherboard decides:
✔ How fast your PC can run
✔ How many SSDs can you install
✔ What CPU/GPU can you use
✔ Whether you can overclock
✔ How long your PC will last
✔ Whether your PC can support future upgrades
In short, your motherboard is the heart of your PC’s upgrade path.
If you know it, you always make safe and smart upgrade decisions.
Check Your Motherboard Using Windows PowerShell
If you don’t want to install anything and prefer a cleaner tool than Command Prompt, PowerShell is your friend.
Think of PowerShell like a more organized “family helper” it gives you clear, neat information without shouting too much technical stuff.
Steps:
- Press Windows Key
- Type PowerShell
- Click Windows PowerShell
- Paste this command:
Get-WmiObject win32_baseboard | Format-List Product, Manufacturer, SerialNumber, Version
What You’ll See:
You’ll get:
- Motherboard Model
- Motherboard Manufacturer
- Serial Number
- Version
Why PowerShell Is Better Than CMD
- Cleaner output
- Fewer errors
- Fast and reliable
Check Your Motherboard Using DirectX Diagnostic Tool (dxdiag)
This method does not always show the motherboard name directly,
But it gives system details that can help confirm your hardware.
Steps:
- Press Windows Key + R
- Type dxdiag
- Press Enter
You’ll Find:
- CPU details
- BIOS version
- System model
- System manufacturer
If your PC is pre-built, this can indirectly help identify the motherboard.
For example:
- HP 280 G3 → comes with Higos motherboard
- Dell Inspiron 3847 → usually has Dell 088DT1
So, dxdiag helps you verify your model quickly.
Check Your Motherboard Using BIOS/UEFI
BIOS is like the brain’s control room inside your PC.
Every PC motherboard stores its identity here.
This method works even if Windows is not installed.
How to Enter BIOS
Restart your PC and press the right key:
| Brand | BIOS Key |
| ASUS | F2 or Del |
| MSI | Del |
| Gigabyte | Del |
| HP | Esc → F10 |
| Dell | F2 |
| Acer | F2 |
| Lenovo | F1 or F2 |
Where to Check Motherboard Info
Look for:
- System Information
- Product Information
- Main → Motherboard Model
You’ll typically see something like:
- ASUS PRIME B450M-A
- MSI PRO B660M-P
- Gigabyte H610M-S2H
Check Your Motherboard Physically (Open Case Method)
If software doesn’t help, checking physically is the 100% accurate method.
Imagine checking a cupboard label in your home to know who owns it the motherboard works the same.
Safety First
- Power off PC
- Unplug cable
- Press power button once to drain electricity
Where to Look
On the motherboard surface, usually near:
- RAM slots
- PCIe slot
- SATA ports
You will find printed:
- Model name
- Brand
- Serial number
Common examples:
- ASUS PRIME B450M-K
- MSI B550-A PRO
- Gigabyte Z690 AORUS ELITE
How to Find Motherboard Details on a Laptop
Laptop motherboards are different.
You cannot open them easily (and you shouldn’t unless you know what you’re doing).
Use:
- Speccy
- CPU-Z
- Command Prompt
- DXDIAG
- Manufacturer’s support website
Laptop Example
If your laptop model is HP 15-da1070wm, then your motherboard might be:
- HP 84FD
You can check this on HP’s support website using your serial number.
How to Find Out What Motherboard You Have Without Turning On PC
This is helpful if:
- Windows crashed
- PC won’t boot
- You installed new parts
You can:
- Open the PC case
- Check the printed model directly
- Search the model on Google
- Find full details (chipset, RAM support, etc.)
Find Motherboard Details Using Brand Support Websites
Every major brand allows you to check your motherboard using:
- Serial number
- Model number
- Product ID
Examples
ASUS:
→ “MyASUS” app or Support → Enter serial number.
MSI:
→ “MSI Center” → Product Information.
Gigabyte:
→ Support page → Enter model.
Why Knowing Your Motherboard Model Really Matters
Many beginners think:
“Why should I even care about the motherboard name?”
But your motherboard is like the main wall of your house.
Every room (CPU, RAM, GPU, Storage) is connected to it.
If the main wall can’t support something, you can’t upgrade safely.
Knowing Your Motherboard Helps You:
1. Upgrade Your CPU Safely
Every CPU requires a specific socket.
Examples:
- Intel 10th/11th Gen → LGA1200
- Intel 12th/13th/14th Gen → LGA1700
- AMD Ryzen 1000–5000 → AM4
- AMD Ryzen 7000 → AM5
If your motherboard doesn’t support the CPU you want, your PC won’t turn on.
2. Choose the Right RAM
Motherboard decides:
- DDR3 / DDR4 / DDR5
- Speed support (2666 / 3200 / 5600 MHz)
- Maximum capacity (16GB / 32GB / 64GB / 128GB)
Knowing the model stops you from buying the wrong RAM.
3. Install the Right GPU
Some motherboards only support:
- PCIe 3.0
- PCIe 4.0
- PCIe 5.0
If your GPU is much faster, your PC performance drops.
4. Add SSD/HDD Properly
Your motherboard decides:
- M.2 NVMe support
- SATA ports
- PCIe lanes
Some boards only support SATA M.2, not NVMe.
5. BIOS Updates
BIOS updates help you:
- Support new CPUs
- Fix bugs
- Improve performance
- Stabilize RAM speed
But you can only update BIOS when you know your motherboard model.
How to Understand Your Motherboard Model (Simple Breakdown)
Let’s decode a common example: ASUS PRIME B450M-A
ASUS = Brand
Company who made the motherboard.
PRIME = Series
Type of motherboard (budget, mid-range, high-end).
B450 = Chipset
This tells you:
- CPU support
- PCIe support
- Overclocking support
- RAM speed support
Example: B450 supports Ryzen 1000–5000 CPUs.
M = Form Factor
Motherboard size:
- ATX = Full size
- Micro-ATX (M-ATX) = Medium
- Mini-ITX = Small
A = Version
Small variations of the same board.
Common Motherboard Brands and How to Identify Them
1. ASUS
Look for:
- TUF GAMING
- PRIME
- ROG STRIX
- PROART
2. MSI
Look for:
- PRO
- MAG
- MPG
- MEG
3. Gigabyte
Look for:
- AORUS
- GAMING X
- UD (Ultra Durable)
4. ASRock
Look for:
- Steel Legend
- Phantom Gaming
- Pro Series
Most Common Locations Where Motherboard Model Is Printed
1. Under RAM Slots
Many brands print it here.
2. Near PCIe Slot (Where GPU Goes)
Clear big letters.
3. On the Top-Right Corner
Common in ASUS, Gigabyte.
4. On the Back Side (rare)
Some OEM manufacturers do this.
What To Do After Finding Your Motherboard Model
Once you know your model, here’s what to do next:
✔ Step 1: Search It on Google
Example: “MSI B450-A PRO specs”
You’ll get:
- Supported CPUs
- RAM support
- BIOS download
- Slot details
✔ Step 2: Check Upgrade Options
You can decide:
- CPU upgrade
- RAM upgrade
- SSD upgrade
- GPU upgrade
✔ Step 3: Download Correct Drivers
Motherboard website → Support → Drivers.
✔ Step 4: Save Model Number for Future
Write it somewhere safe.
Frequently Asked Questions (FAQ)
How do I check my motherboard without opening my PC?
Use:
- CMD (wmic)
- PowerShell
- System Information
- Speccy
- CPU-Z
How do I check my motherboard on Windows 10?
The fastest way:
wmic baseboard get product,manufacturer
How do I check my motherboard on Windows 11?
Use:
- Settings → System → About
- CPU-Z
- Speccy
Will checking motherboard info damage my PC?
No.
These methods are completely safe.
How can I check my laptop motherboard?
Use:
- dxdiag
- System Information
- Manufacturer website
How do I know what kind of motherboard I have?
You can check it inside System Information on Windows (type msinfo32), or use tools like CPU-Z which show the motherboard model.
How do I see what motherboard I have without turning it on?
Open the PC case and look for the printed model name on the motherboard (usually near the RAM slots or CPU area).
How do I find my motherboard in Device Manager?
Device Manager does not show your motherboard model directly; you must use System Information or a tool like CPU-Z.
What motherboard and BIOS do I have?
In Windows, open System Information → check BaseBoard Manufacturer, BaseBoard Product, and BIOS Version/Date to see both.
Conclution:
Whether you:
- Upgrade CPU
- Install new RAM
- Add an SSD
- Update BIOS
- Fix performance issues
…knowing your motherboard helps you make smart, safe, and future-proof decisions.
This complete guide gives you every possible method, simple explanations, and expert-level tips to make the process easy, even if you’re a beginner.
You now have the most complete, optimized, and beginner-friendly motherboard identification guide on the internet.